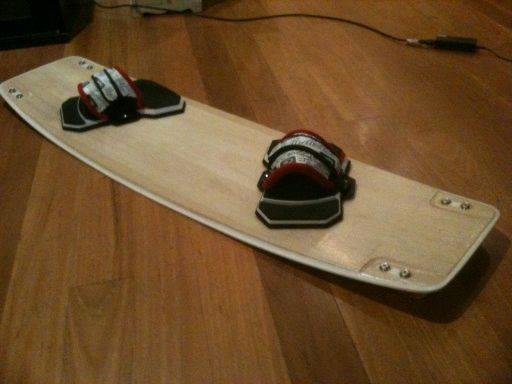
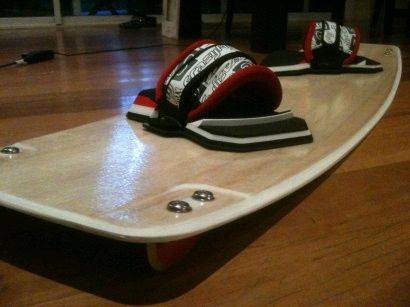
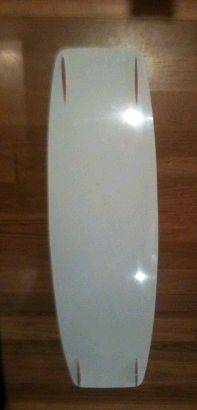
Finally finished my second homemade board and thanks to some great tips from other board builders on seabreeze it was a big step forward from the first, very dodgy board I made last year.
Its 133x39cm, 4.5cm continuous rocker, 5mm concave. The core is 2x6mm PVC foam (Klegecell) with balsawood veneer over the top. 2x6oz e-glass (one at 45/45 degrees), 1x 4oz s-glass on each side of the board.
To help design this board I put together an excel spreadsheet that lets you create the outline, rocker and concave templates for the rocker table and estimate the weight of the board. It came in pretty handy and if any other DIY board builders want a copy you can download it free from the link on this page.
www.boardbuilders.co/2011/05/my-first-plagarism-free-board.html
It was put together in MS Excel 2007 and doesn't open properly in earlier versions ( the chart series get dropped for some reason). It contains a VB macro for generating the splines used to get the smooth curves used for the outlines so you'll need to enable macros.
There is a very very beta board flex model in the workbook which attempts to predict the flex of the board under different loads. Its currently way off the mark but I have left it in there in case anyone with some background in the area can help me refine it.
Thats a great looking board, although Im not a fan of the construction method You used.
The foam core makes for a bone like, and bone hard board, if you reduce the glass to get some flex, these boards tend to break easily, saying that, if you want a board with very little flex, this is the way to go.
Great finish and smooth shape!
If you don't mind me asking, what resin did you use, what footstrap inserts how did you do the rails?
Hey Matt, thanks for sharing. It's about 15 years since I made anything from fibreglass and back then epoxies all had pretty poor UV tolerance. Has anything changed or are you just going to try to minimise exposure?
ABS is durable for sure but heavy and hard to get stuff to stick to as you mentioned. There have to be better rail alternatives. Slingshot are now doing single shot urethane rails. That's out of my area so I've no idea how that would translate to DIY situations. Any other brainstorm ideas on DIY rail materials and techniques?
Adding to the material discussion. Some experience gained working with fibre reinforced plastics in the aerospace and oil/gas industry over the last few years:
Alternative rail materials:
I don't understand why everybody uses ABS (as said it is difficult to bond). Some thermoplastics which bond well to epoxys and which are tough enough for rails are: HTPE, TPU, PA11/PA12, PSU, PES, PEI, PEEK. (in order of price left->low, right->high). HTPE and TPU shuld do the job and are easy to bend using a BBQ ![]() . For a high-end board maybe PA11. The others are hard to bend as Tm/Tg to high - for BBQ.
. For a high-end board maybe PA11. The others are hard to bend as Tm/Tg to high - for BBQ.
UV resistance:
UV resistance of epoxies are poor however the effect over the lifetime of a board is small (maybe some yellowing) – more of a problem for boats which are outside 24/7.
The industry standard seems to be to use PBT film to protect the board from UV. On top of that PBT is easy to print. I think for “home made” PU top coat would do the job too.
Inserts:
Would be interesting to try non-metal inserts made from some of the plastics mentioned above using "plastic screws"…
Should have written HD not HT (HD=High density) -sorry
PU vs. Epoxy: The only advantages of PU is the lower price, slightly higher toughness, better UV resistance and mixing ratios can be varied. However, I think epoxies are still the way to go. Mechanical properties are a lot better, bonding is easyer and modern epoxy formulations have significantly increased toughness. In addition and maybe the most important point when doing it at home (if you have girlfriend, wife, etc.) is that epoxy are odour less- most PUs smell horrendous…
To all DIYers (and epoxy using businesses too), bear in mind that while epoxies are pretty much odourless, they do let off chemicals that have serious long-term effects on your immune system. Sure, the odd pot of 5 min araldite won't hurt but ongoing exposure has cumulative and irreversible effects including hyper-sensitisation to other chemicals. Steve McGeary (of Speed Sailboards, 80s and 90s) got to the point where he had a major reaction to things like shampoo and beer.
Please minimise your exposure by wearing appropriate gloves and respirator, using ventilation, and generally minimising the amount of toxic stuff that you use in the first place.
Perhaps epoxy manufacturers should include an offensive but harmless scent in resins to give people an immediate incentive to take care?
You are the master sourcer! I have recorded all those links that you put up on the home made board post a few weeks back and there is some real gold among them.
Thanks for sharing all the good info.
Cheers
Matt
Thanks for the info,
last time I went out at pazza I came back with only three fins. My mate has made a couple boards now, just not sure if I am willing to put in the effort required.......
Great looking board . The spred sheet program looks good too all i need is to be a expert in spread sheets to drive it any tips like wear and how to look at the designs that are there or build own on it like wear do ya start to put in legth and width . i am doing one very soon for first time . Also what is the resign part number ( there is like a billon differt type of epoxy resin) for building boards with foam core .

Hey Fossil
Very interested in the ones you've molded. Would be keen to see some pictures if you got them.
How much glass/resin did you use? Any tips no what to-do and not to-do?
The price of fins is stupid so I'm keen to try make your own.
Cheers
Matt
you guys sound like you are all over it but there are some neat ideas and advice re epoxy , glassing on wooden boards etc on www.swaylocks.com/ and woodensurfboards.blogspot.com/ and www.paulowniaparadise.com.au/surfboards.htm
mainly surfboard stuff but glassing is pretty universal.....
another interesting site if you are little handier with a welder and wiring
www.mechmate.com/forums/index.php
would love to have a go but know SFA about welding
great job on the board stikflik
Hi Board builders,
I finally got around to photographing my fins& mould.
You can find a similar moulding technique on the Freeshaper website (might need to brush up on your French)
www.freeshaper.com/kite/index.php?rub=MAKING&ssrub=Fins
My wife & I attended a moulding class @ Adelaide moulding & Casting, her for resin jewellery & me for the fins.
As I have stated before you may need to weigh up the cost of making your own vs. buying outright.
A quick add up for my type of mould would be approx $70.00 +
Kleen Klay $5.25
Pinkysil $33.60
“Stoner E302 Rocket Release” Spray release agent $ 23.10
Enough Epoxy for fins $??
Freight for online purchases $??
These are just some of the fins that I have moulded
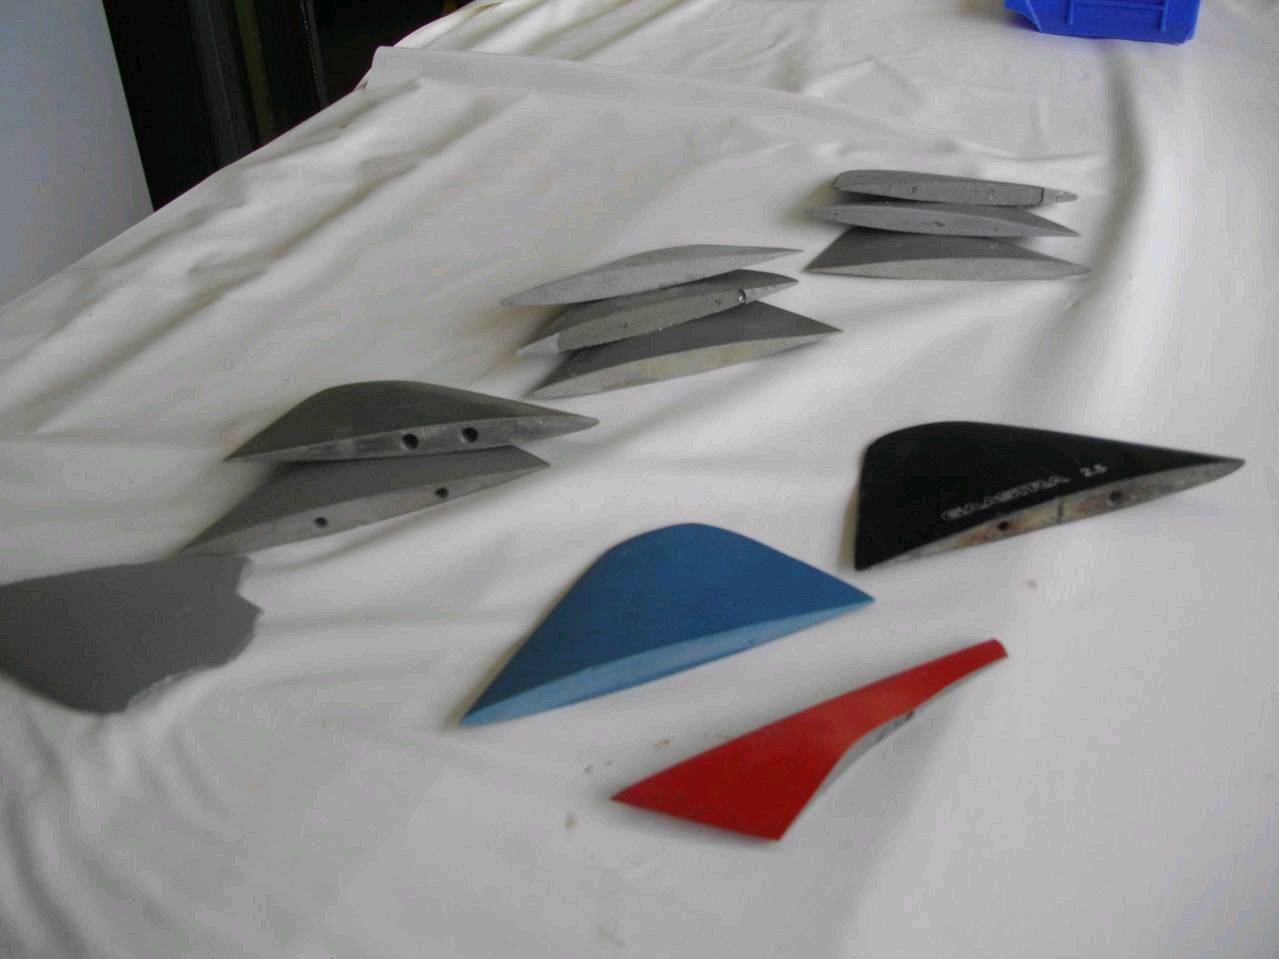
The fins I have created so far have been without reinforcing i.e. no matt in the fin.
They tend to break easier than the original fins. Difficulties easily overcome by the addition of scrap matt.
I use a grey epoxy paste which is similar density to normal fluid epoxy which has been thickened with micro balloons etc.
I have not experimented with fluid epoxy but that may come soon.
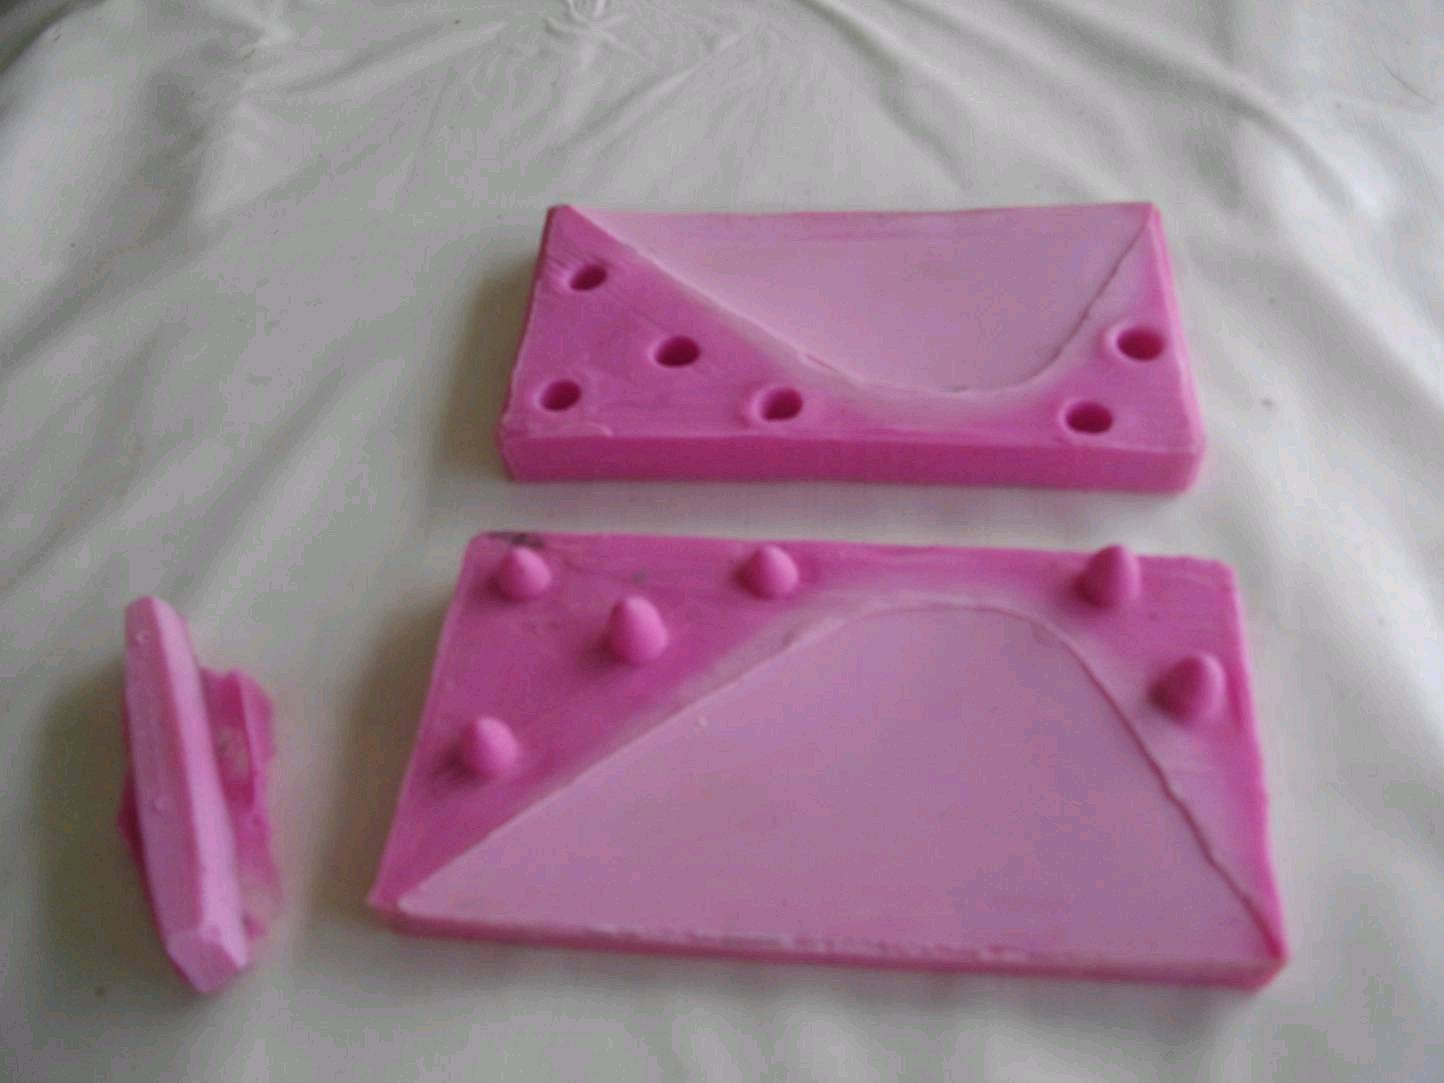
The Mould
Mine is a 2 piece mould, sometimes referred to as a Splat mould.
Find a reservoir (mine is a rectangular plastic box)
Embed half of your original fin in the clay to half the depth of the reservoir.
Smooth the clay flat. Poke some indents in the surrounding clay with a pen/pencil to create locating pins for the mould. (see pic )
Spray with release agent (important step)
Pour the top full of silicone & let fully cure
Clear out your reservoir of clay etc.
Place your cured first half of the mould into the reservoir.
Place your original fin on this cured half .
Spray with release agent (important step)
Pour the top full of silicone & let fully cure.
This should result in a two piece mould (with locating pins).
You can use the 2 piece mould clamped together & pour in epoxy or you can use the same method as me & thicken the mix and lay into 2 pieces then “splat” together, hence the name.
If you are pouring in your epoxy you should pour from a high position to get a thin, slow stream of epoxy into the mould. This reduces/breaks bubbles entering into the mould.
My original fins were 65 mm high, so I made an extra silicone mould piece to fit into the top of my mould hence reducing the height to 50mm.
A stumbling point for most will be the threaded holes in the fin. Get them wrong & the fin will break out on the sides. (Unless you mould really fat fins).
I have had two differing fin mounts. The first was to shave the heads of 6mm stainless bolts then embed the heads into the fin. I attached the fins using nylock nuts (ugly but strong).
**note If my un-reinforced fins break, it is usually below the level of the threads, (see red broken fin in the pics).
The preferred method I use is to drill & tap the holes (10-24 UNC), as per the usual method on most boards.
Cheers
Fossil
the 2 piece mould is a nice idea, I was stuffing around with a one piece silicone mould a few years ago, very crude, and it was hard to feed fibre glass into it before filling with epoxy,
For threads, I wraped a wetted out strand of fibre glass around the thread of two stainless screws and pushed them into the soft resin, works great.
My bigest problem was bubbles in the finished fin.
All glass fins are manufactured by CNC these days, cut from a layerd up sheet.
I went over to getting fins made up for my boards
Hi Fossil you wont need release agent, the screws came out pretty easy, they snap loose once the resin has cured, I think as long as you dont roughen up the surface of the screws you wont have any problems, actually you may have problems with the coil if its not marine grade steel, give the fibre glass wrap a go.
Ray